by Bill Minter
Over the years, I have had an opportunity to test the cutting action of many board shears. While some are OK, others have a major problem. Not only are they difficult to use, they could be causing serious damage to the components. And in some cases, there is a possible danger to the user. In 2000, the Guild of Book Workers produced a video on maintaining the Jacques Board Shear. That video is still available through the Guild Library. (Note: Be sure to look under the year 2000 – Salt Lake City, Utah for the “Examination of the Jacques Board Shear”.) The following information will supplement that video.
As stated in the video, an immediate safety concern is a pin or bolt to prevent the counter-weight from dropping off. While the weight is known to have dropped a few times, fortunately, there have been no serious injuries. To prevent the weight from dropping, there should be the hole at the end of the counter-balance bar with a pin or bolt as a safety; if not, one should be added immediately. Another recent safety concern is the clearance under the clamp bar. This topic will be covered in a future article.

BACKGROUND
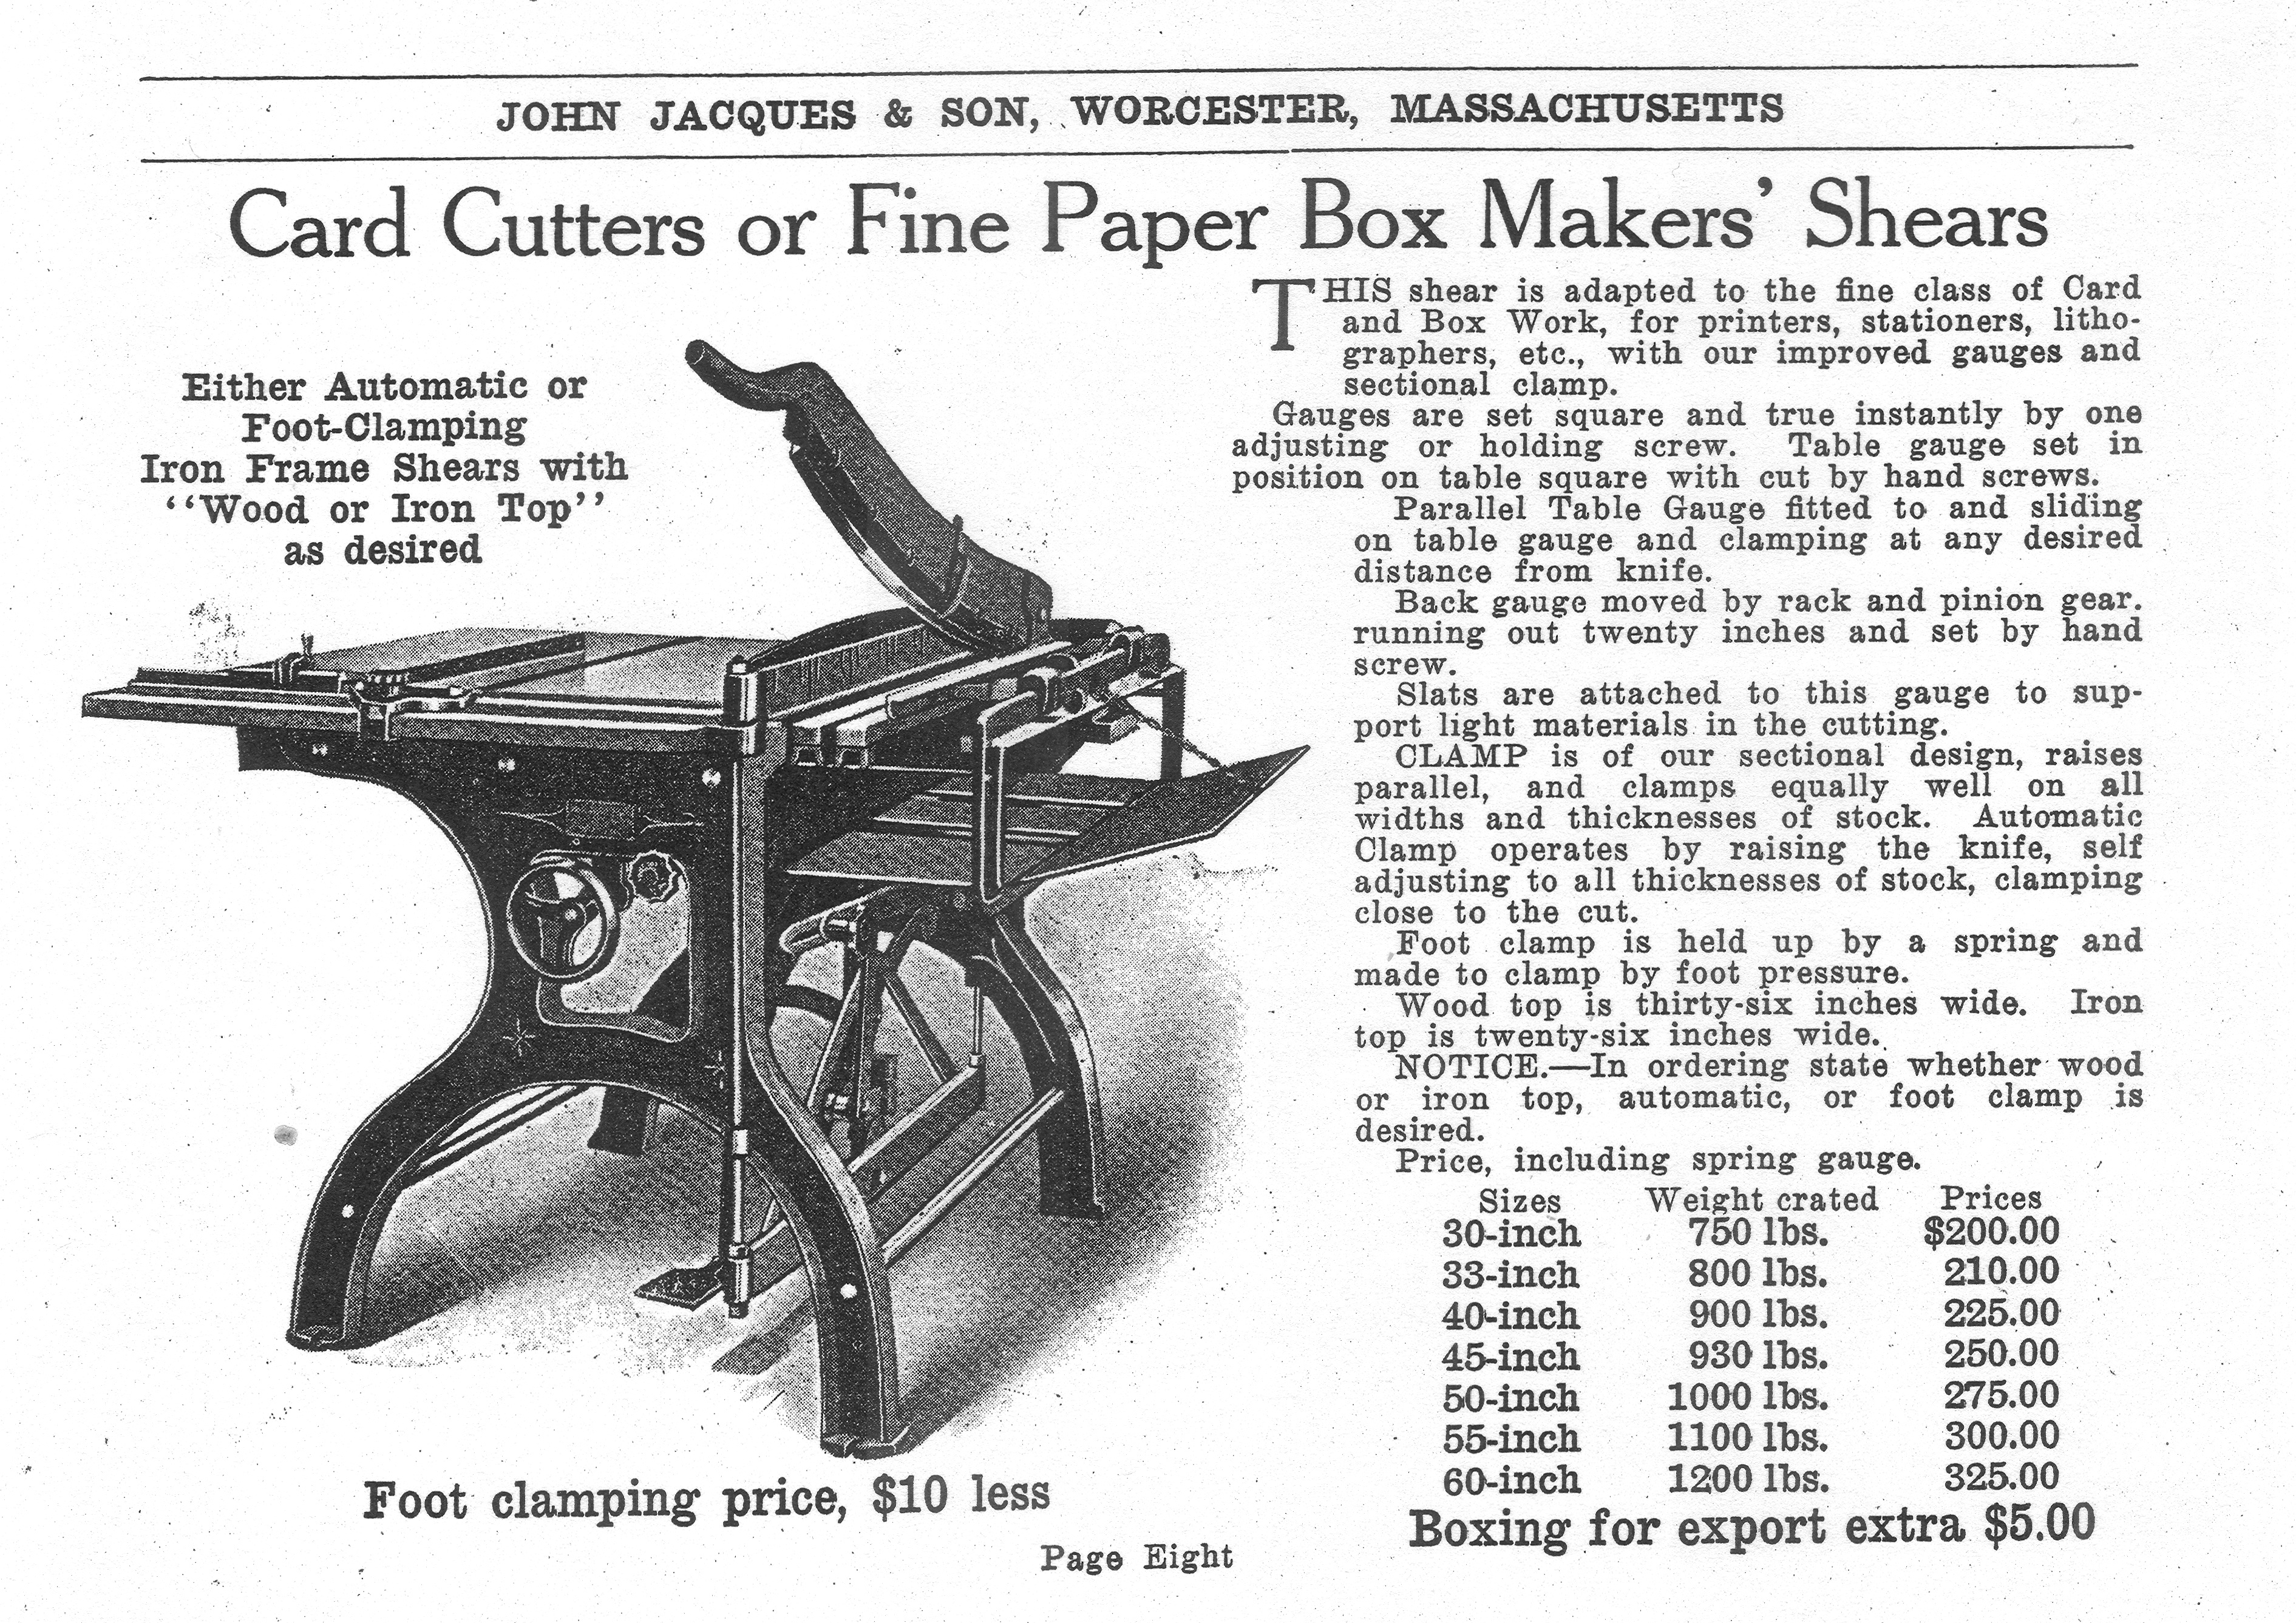
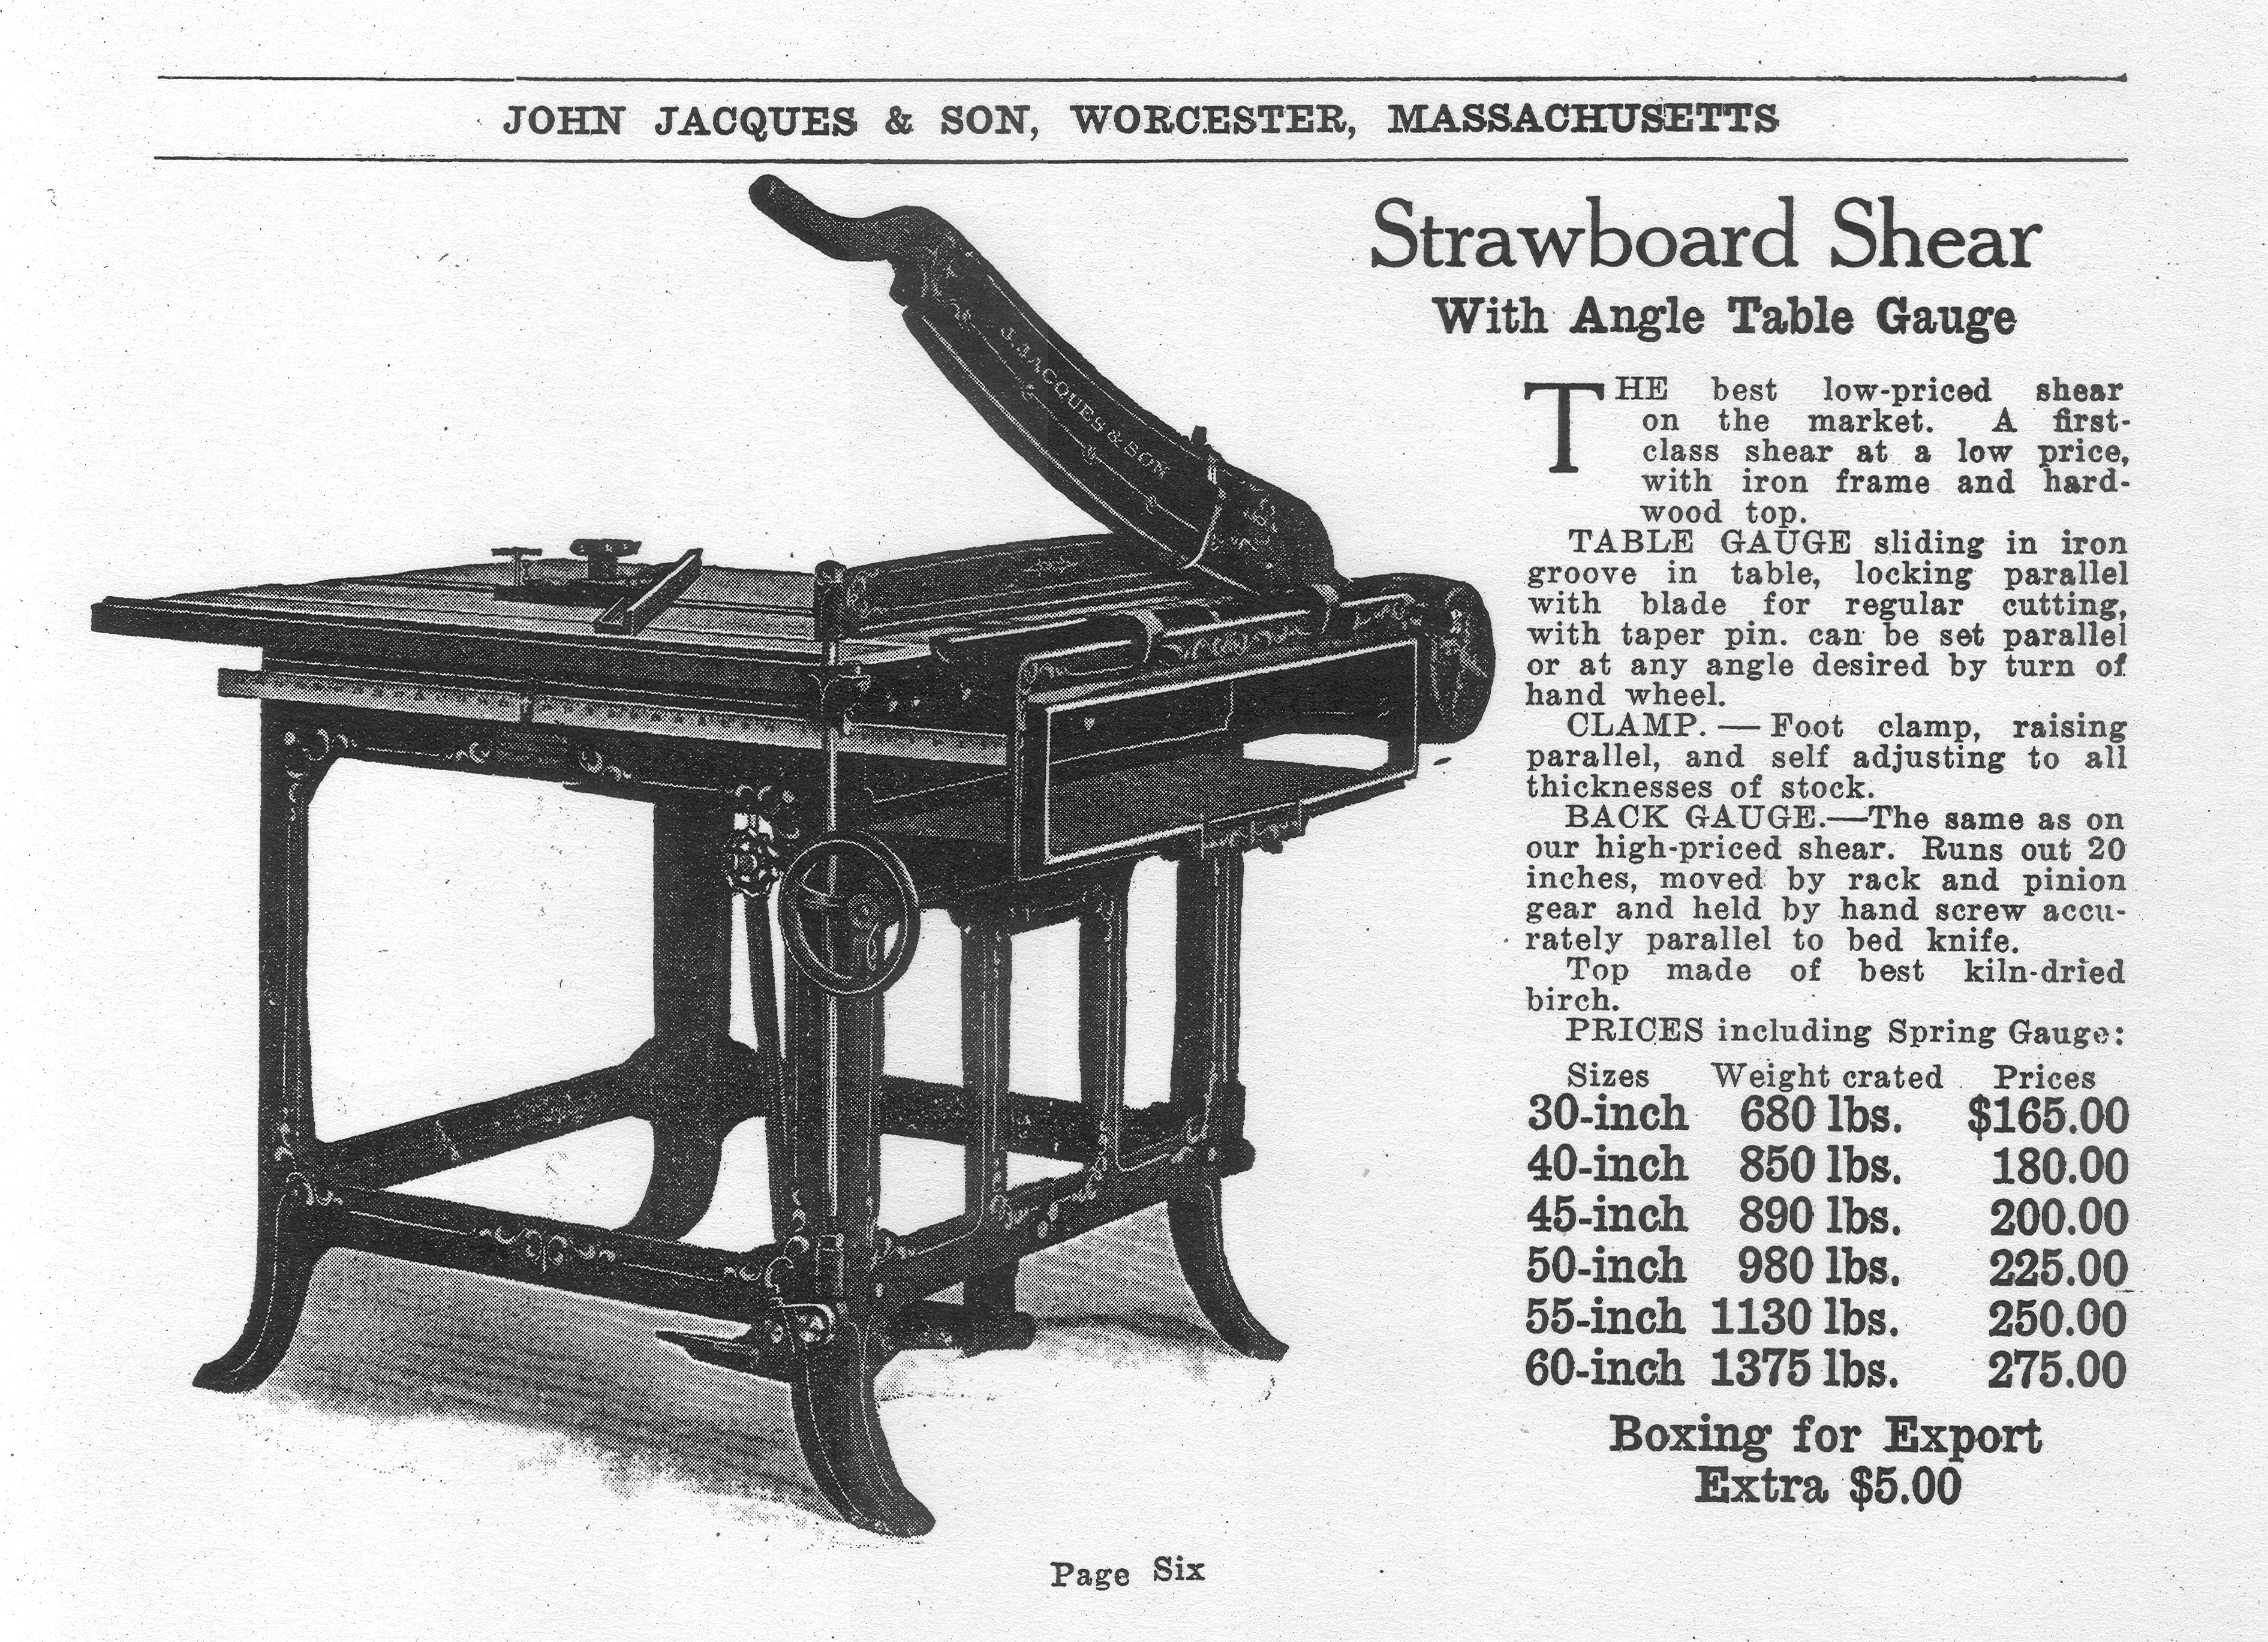
The Jacques Board Shear is available in two models: My preference is the “Iron-Top” that is described by Jacques as a “Bookbinders’ Shear.” Note that the cutting blade support of the Bookbinders’ Shear is a heavy, angular casting that is less prone to flexing during a cut. The second and very common model is the “Fine Paper Box Makers’ Shear” or the “Strawboard Shear” with a wooden top. In this model the upper blade is supported by a flat, rectangular casting that may flex during a cut.
In either model, the cutting blade should ideally move freely along the bed blade without pinching or binding. In fact the blade should ‘sing’ sweetly, smoothly and uniformly during the movement when not cutting any material. If everything is adjusted properly, a sheet of tissue paper or thin Japanese paper should cut cleanly. Occasionally, people may think that the blades need to be sharpened, but the upper blade may simply need an adjustment. Furthermore, one blade sharpening company has even suggested that the blades on our shears should only need to be sharpened every twenty years — see more information about sharpening at the end of this article.
Following is a diagram of the components for adjusting a Jacques Board Shear. Note that the cutting blade is supported on a Hub that pivots between the two Axle Bolts. These Axle Bolts push against one-another thus supporting the Hub. These bolts are adjusted to provide the proper clearance between the cutting blade and the fixed bed blade. Also note that these two axle bolts must be locked or secured by the adjacent Jam Nut, otherwise these bolts will loosen when the shear is used. Another nice feature in the Jacques design is the yoke that can be rotated or pivoted by two adjusting bolts, after loosening two other bolts. By adjusting these bolts, the cutting blade is made perfectly parallel to the fixed bed blade, even after decades of use.
Additional Notes before making any adjustments:
- Note that the thickness of some blades may have been overly ground and that the blades may not be flat. In other words, the blades could be warped. Since the blades will never lay flat, this may create a problem with the adjustments. See the additional notes at the end of this article about sharpening.
- Both the bed blade and the cutting blade should have been attached to a clean and uniform surface. All old shims should have been removed and the mounting surfaces should be clean of anything that could interfere with a uniform surface.
- The pivot points of the Axle Bolts and the Hub should be cleaned and lubricated with heavy-duty grease, such as automotive wheel bearing grease.
- Special tools are needed: Two large adjustable wrenches are needed for the Axle Bolt and Jam Nut, one of which must be capable of fitting the large jam nut that is 1-7/16″; other smaller wrenches will also be needed.
Adjustment of the Cutting Blade — Patience is required:
1) Before making any adjustments, lower the cutting blade SLOWLY AND CAREFULLY and observe the contact point of the two blades. Ideally, the cutting blade should lightly contact the bed blade during the entire cutting motion — there should be no need to pull on the cutting blade handle. Note that the bed blade has a slight inward grind, thus there will be clearance between the blades after the upper cutting blade has passed the cutting point. If the cutting blade pinches at any point, or if there is excessive clearance in an area, an adjustment should be made.
A.1) Blades pinching in one area: If the upper blade is pinching, then the axle bolts need to be adjusted. First loosen the jam nut for bolt A and then loosen A a small amount, perhaps about 15 degrees (less than 1/16th of a full rotation) —note: a tiny adjustment may have a huge affect on the alignment of the blade, so one must be very patient. After adjusting, re-secure the jam nut. Then loosen jam nut B, and adjust bolt B, though not too tight. While holding B in place, re-secure the jam nut. Slowly lower the cutting blade for a test. Adjust more as needed.
A.2) Excessive clearance all-along: If there is excessive clearance or if the blade is not making contact, then the axle bolts may need to be adjusted. First loosen the jam nut for bolt B and then loosen B a small amount, perhaps about 15 degrees (less than 1/16th of a full rotation). —note: a tiny adjustment may have a huge affect on the alignment of the blade, so one must be patient. After adjusting, re-secure the jam nut. Then loosen jam nut A, and adjust bolt A, though not too tight. While holding A in place, re-secure the jam nut. Slowly lower the cutting blade for a test. Adjust as needed.
A.3) Other: If the blade is making light contact in the middle of the length of the blade, but not at the ends, the upper blade is probably already parallel to the bed blade. In this case, the blade may need to be shimmed at the ends — see # 3 below.
B) Cutting at one end: If the upper blade is contacting the bed blade at only one end, it may be necessary to adjust the yoke — see step 2. The upper blade must first be parallel to the bed blade before making the final adjustments.
2) Adjusting the Yoke: Note that the Yoke is secured by two bolts (2b) under the Hub. If you need to adjust the yoke, loosen these bolts slightly. Then loosen one of the bolts at 2c and then tighten the other (both bolts should be snug afterwards) — this will rotate the yoke. Note that small adjustments can make a huge change, so be patient. After adjusting, re-tighten the bolts 2b. Lower the blade slowly and carefully to test the cutting. Readjust as needed until the upper blade is perfectly parallel to the bed blade. Then adjust the clearance following section A.2.
3) Shimming the Cutting Blade: Thin sheets of Mylar (polyester film), such as 2, 3 or 4-mil, seem to be the best material for shimming. The pieces of film should be cut to fit between the bolts that secure the cutting blade to the support handle; the pieces should also be long enough to reach the top of the blade and also extend beyond the bottom. The pieces of film can be folded/creased so that they will stay in place when the bolts are loose. With the shims long enough during the adjusting process, a record can be made of what has been inserted and where; these extensions will be trimmed off when the adjustments are complete. Add shims as needed and tighten the bolts securely before each test. Add (or remove) shims as needed for a perfect cut, and then trim off the excess shims.
Continue adjusting until the cutting blade sings and will cut a thin piece of paper easily. Be patient, as it will take time for a proper adjustment.
* Sharpening the Blades — The blades should be ground to the same angle as the original. In some cases, the grinder may want to remove stock from both the height and the width (thickness) of the blade. If the blades are in good condition, there should be little or no stock removal from the width/thickness of the blade to insure a solid, stable blade. Excessive grinding of the thickness will make the blade too thin and then difficult to adjust. Therefore, most sharpening should be done by only removing metal, for example from the top, from the height of the blade. In other words, for the bed blade, the sharpening would be to take a little off the top. If the blades are too thin from over-grinding, they will not lay flat and could pose a problem.
— Note that both blades are composed of two different hardnesses of metal: The main portion of the blade is a standard steel, but the actual cutting edges are a much harder metal that has been inlaid. Scratching the side and the top of the blade with a needle can show this hardness.
— Also note that most upper cutting blades are flat and wider along the bottom edge, thus providing extra strength for cutting binder board. Some other shear blades may have been sharpened like a guillotine blade with a point. Since the angle is acute, this style of blade is better suited for cutting only paper.
One final note: It would be a good idea to schedule an annual test of all bolts to be sure they are snug and tight. This is especially true for the foot-treadle bolts, as they seem to loosen first. ALSO, be sure that the bolts for the counter-weight are still tight.
The board shear is an important and essential tool in our bindery. It is the focal-point. It should always be in good condition for safe operation. Good Luck.
If there is a need for any further clarification, please let us know.
Sincere Thanks to Richard Baker for his assistance.